


Introduction
Ever wondered how websites work? Well, for a typical multi-paged website, we enter a URL in our browser and that sends a request to the server. The server handles the request for that address and sends back an HTML page that we view in the browser.
Now if we want to click on other links in that website, e.g. the about page or contact page, a new request is sent to the server and then the server responds by sending the about.html page or contact.html page. This cycle continues for as long as we are making requests on that website.
However, react routing does not work like this. All the routing and page changes are delegated to the browser only. However, the process is quite similar. A request is made to the server and the server responds by sending the HTML page to the browser but the server also sends the compact React JavaScript files that control our applications. React and the react-router takes full control from this point by injecting the contents dynamically using the components we create.
React-router hosts several applications in your website where javascript will be constantly rendered on the page without having to reload the browser. This process means fewer requests are made to the server, resulting in a faster experience.
In this article, we would go through how to get started with routing in react.

Installing Nodejs
The target audience for my articles are complete beginners so I am assuming you do not have Node.js installed yet so let's start from there. This is easy as you can download the package here .
Creating a React app.
Next, let's create a React app. To do this, go to your terminal and type npx create-react-app (folder name). For example:
npx create-react-app react-project
Click enter and let the packages install - this could take a few minutes depending on your network speed. Now that we have created a folder for our work, you need to open that folder in your IDE (this means an Integrated Development Environment which is your Visual studio code, Notepad, etc) and also ensure you are working within the right folder. To do that, type cd [your folder name] in your terminal for example:
cd react-project
Installing React Dom.
The next step is installing the library that will handle the routing and start your development server. In your terminal, type one after the other
npm install react-router-dom

npm start
You should receive a message that it’s compiled successfully and you can now view it in your browser. All you will see now is a rotating react logo and that is fine.
Creating your Components.
For a neat project, it is best practice to store all your components in a ‘components’ folder. To do this, simply create a folder named ‘components’ and you can begin creating your files/pages within. You can have as many files as you need for your project in this folder.
Routing.
As seen in the image below, I created three components (About.js, Header.js, Home.js) and imported them into the app.js file also known as the root component.
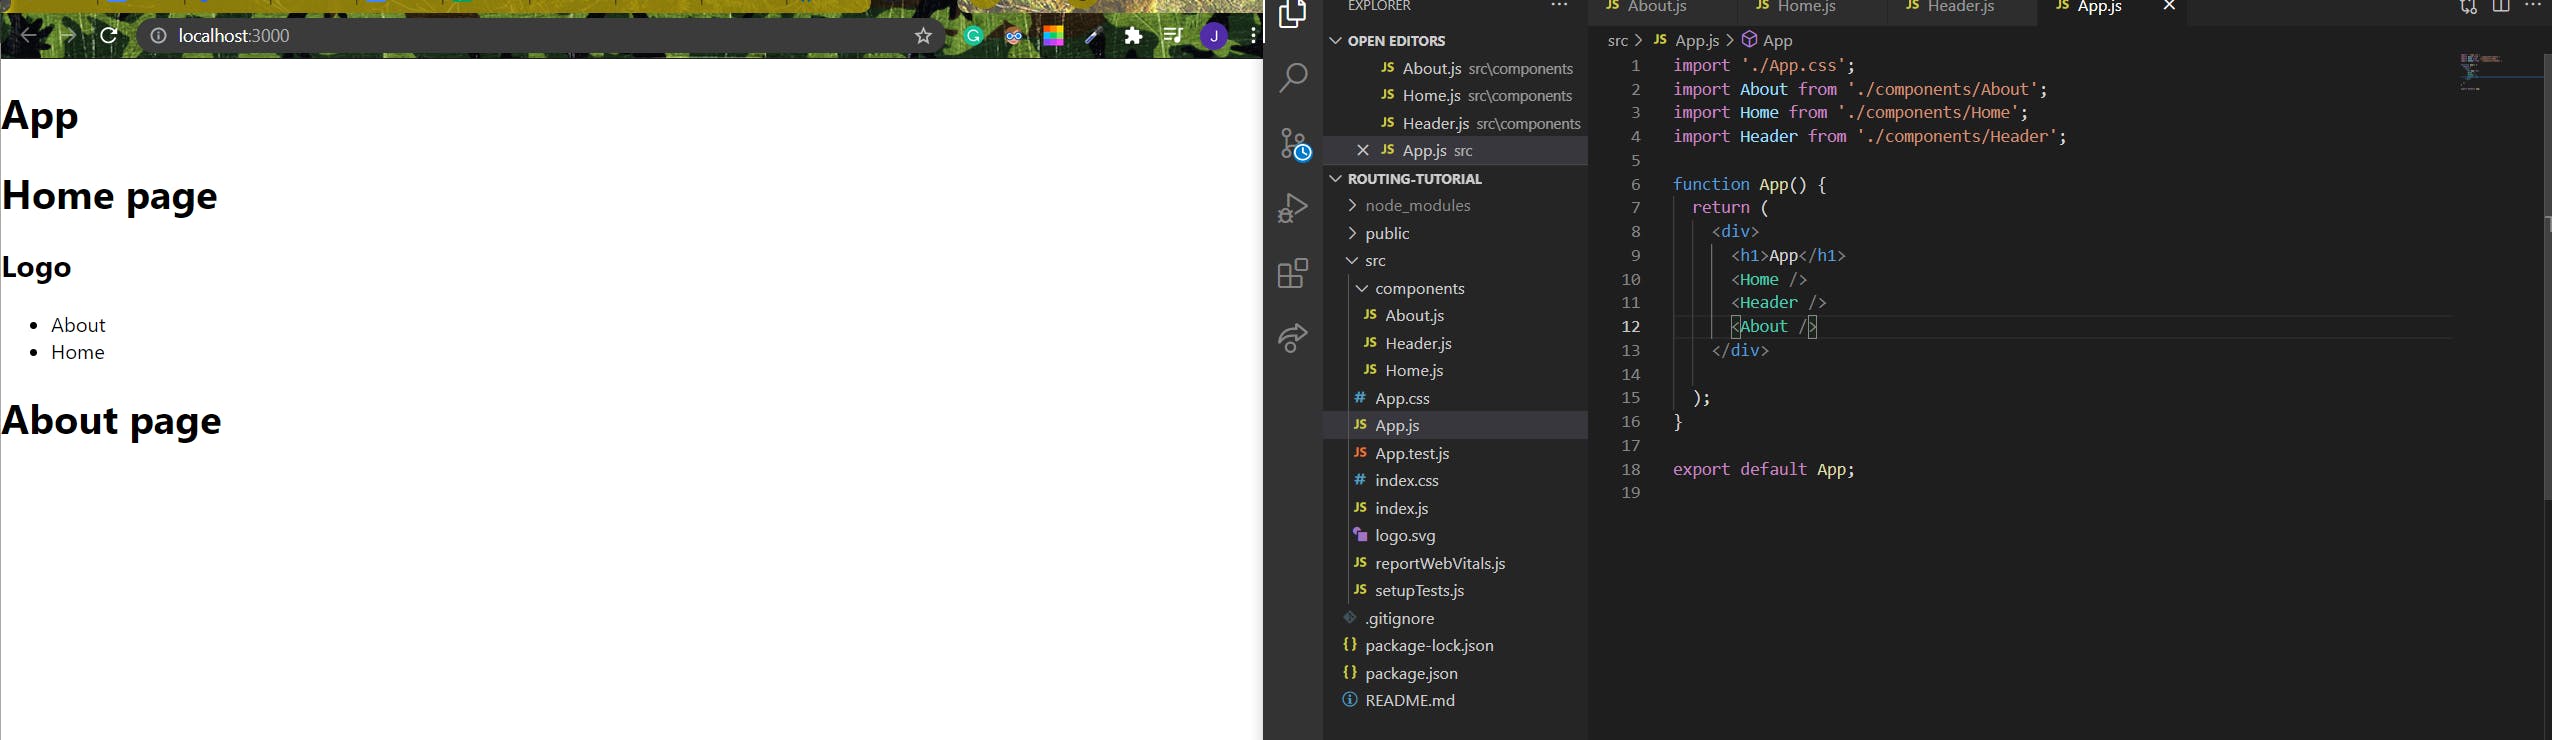
import About from './components/About';
import Home from './components/Home';
import Links from './components/Header';

function App() {
  return (
      <div>
      <About />
      <Home />
      <Header />
      </div>

  );
}

export default App;
Writing your code as seen in the snippet will render your components quite well but not how we want. We want specific parts of the application to be rendered when the route changes. To do so, we need to import the browser router. Add this line of code above your function in your root component or app.js
import {BrowserRouter as Router, Switch, Route } from react-router-dom";
Now we can begin to route.
First, add a router in your function,
function App() {
  return (
    <Router>
      <div>
      </div>
    </Router>
  );
}
then include your routes
<Route path="/about" component={About} />
The path property here refers to how your URL will appear. For example: localhost:3000/about will take you to the about page of the localhost:3000 website and localhost:3000/links will take you to the links page and so on.
See here:
function App() {
  return (
    <Router>
      <div>
        <Route path="/about" component={About} />
        <Route path="/links" component={Links} />
      </div>
    </Router>
  );
}
Have you ever noticed that when you visit a website, you are automatically taken to their homepage? You also can make any of your components the default page.
<Route path="/" component={Home} />
We see in the code above that the path is empty. This is because whenever we load the webpage, we don't want to have to include further descriptions like '/home' in our URL before we can access the home page.
Switch
We are almost done with routing our web application. However, you will notice that there is something wrong. Our homepage renders fine but when we render the about page, the homepage is also rendered. This is because all the pages that include “/” and “about” are rendered and in this case, both the homepage and about page meet these criteria. So what exactly is the advantage of using ? The component will only render the first route that matches or includes the path. Once it finds the first route that matches the path, it will not look for any other matches. The routes are wrapped up in the component which allows for nested routes to work properly. This is something that will not be able to handle. See below how the component is introduced to our code:
<Router>
      <div>
        <Switch>
          <Route path="/" component={Home} />
          <Route path="/about" component={About} />
          <Route path="/links" component={Links} />
        </Switch>
      </div>
    </Router>
With this, we will encounter another problem because the homepage will always be the first route that matches. So how do we fix this? We can fix this by adding 'exact' to the homepage line of code as seen below
<Route exact path="/" component={Home} />
This means that the homepage will be rendered only when that exact path is provided.
Conclusion
React Router is an important part of any React project. We have learnt how to get started with routing in React. When you build single-page applications, you’ll use routes to separate your application into usable pieces that users can access easily and consistently. Taking these first steps will set you on your way to mastering routing. You can replicate this process multiple times to gain mastery of it. If you run into any problems, you can revert to this or look for other similar resources on the web.
I decided long ago never to walk in anyone’s shadow; if I fail, or if I succeed at least I did as I believe. - Whitney Houston